Easiest Way to Record a Podcast on iPhone & iPad Using FaceTime

Forget expensive microphones and recording software—iOS 18 has transformed FaceTime into your personal podcast studio. Here’s how to get started.
Starting a podcast can feel overwhelming, especially if you don’t have professional recording gear. Fortunately, FaceTime’s built-in tools now allow you to capture high-quality audio and video conversations effortlessly. Whether you’re a beginner or a seasoned podcaster, this guide will help you record your next podcast using just your iPhone or iPad.
Why FaceTime is Now a Great Podcasting Tool
Before iPadOS 18, recording podcasts on an iPad was difficult due to system limitations that restricted multiple apps from accessing the microphone simultaneously. This prevented users from recording during FaceTime or Skype calls, forcing podcasters to rely on complex setups with external audio interfaces or separate recording devices.
With iPadOS 18, Apple has simplified the process, making podcasting more accessible. While not a full studio replacement, this feature offers an easy, built-in way to record high-quality podcasts.
Setting Up to Record Podcasts
Note: If you’re in the EU or certain Middle Eastern countries, this feature might not be available yet due to privacy regulations.
How to Record an Audio Podcast on FaceTime
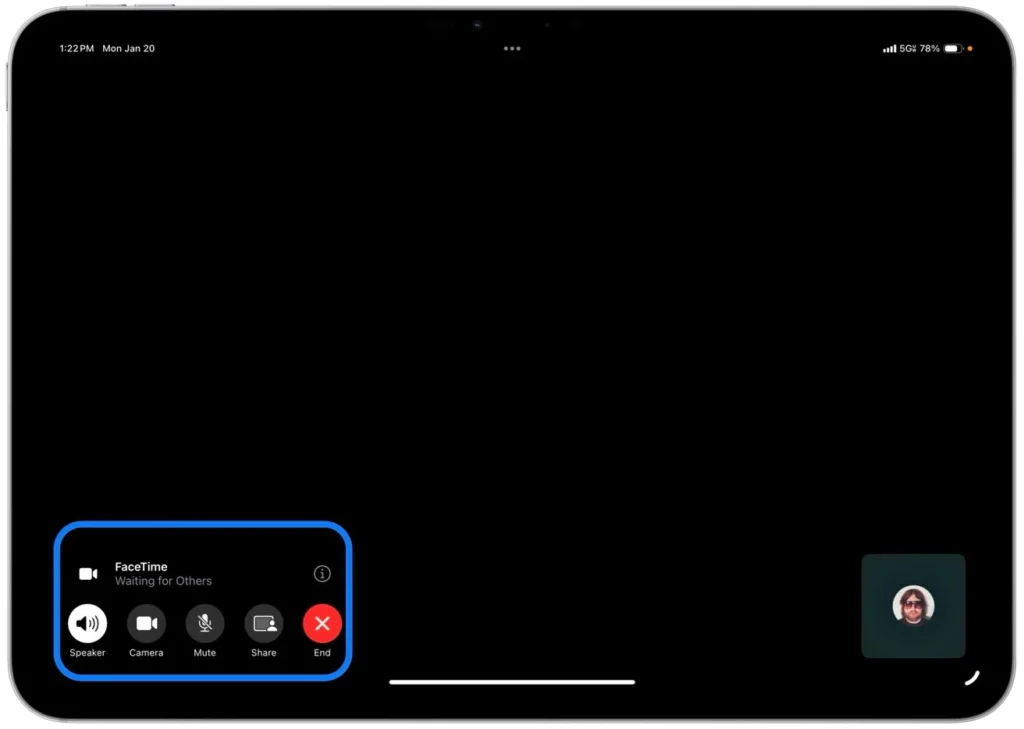
- Open the FaceTime app and start a one-on-one call for an audio-only recording.
- Tap the Record button during the conversation. A quick notification will inform both you and your guest that the recording has started.
- When finished, tap the Stop button or end the call.
Your recordings will be stored in the Call Recordings folder within the Notes app for easy access.
How to Record Video Podcasts on FaceTime
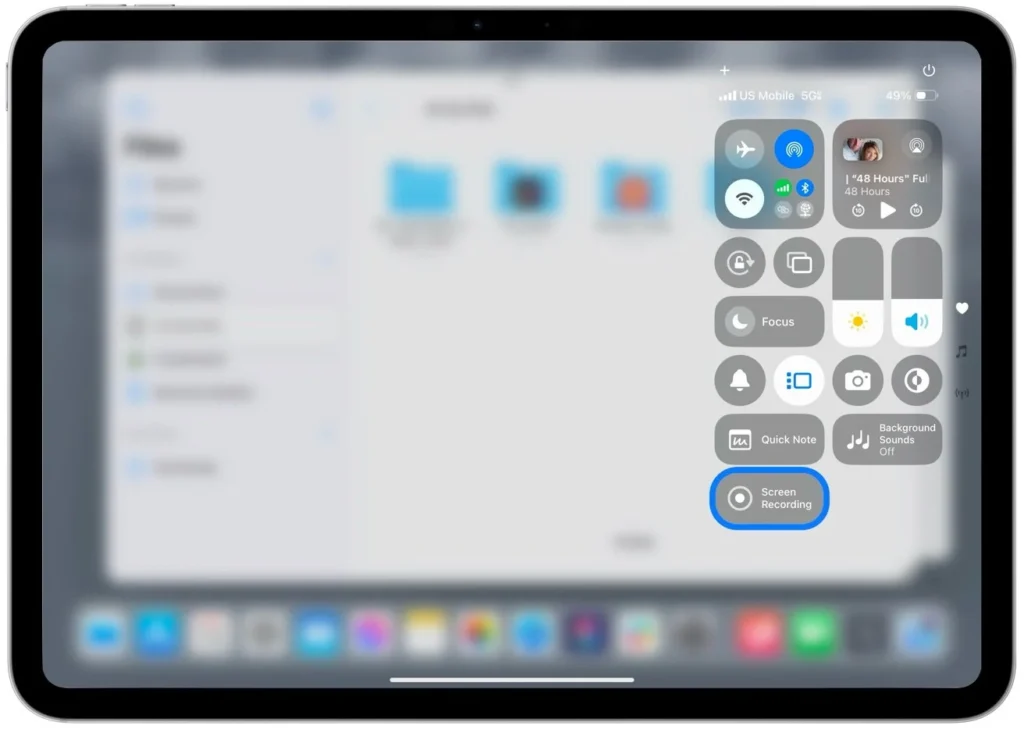
FaceTime’s built-in recording tool does not save video, but you can use Screen Recording to capture both video and audio:
- Add Screen Recording to Control Center via Settings.
- Swipe down from the top-right corner of your screen.
- Tap the Screen Recording button before starting your call.
Video recordings will be stored in the Photos app, while audio files remain in the Notes app.
Tips for Better Audio Quality
Good audio quality is essential for an engaging podcast. Here are some key tips to improve sound clarity:
- Use an external microphone. Even an entry-level USB or lavalier mic will significantly enhance your sound.
- Reduce background noise. Record in a quiet room and use rugs or curtains to absorb echoes.
- Test your setup. Run a quick test with your guest to adjust mic placement and volume before recording.
- Enable Voice Isolation on FaceTime.
- Swipe down from the top-right corner to open Control Center.
- Tap the Mic Mode button (microphone icon).
- Select Voice Isolation to filter out background noise.
Testing these settings before your podcast ensures everything works properly and prevents recording issues.
Using Transcripts to Streamline Editing
One of FaceTime’s most useful features for podcasters is its built-in transcription tool. After recording, your transcript is automatically saved in the Notes app.
How to Access and Use FaceTime Transcripts
- Open the Notes app and go to the Call Recordings folder.
- Select your recording and tap Transcript.
- Copy, search, or edit the text directly in Notes to refine content or create captions.
Transcriptions make editing easier, allowing you to quickly find key moments, create show notes, and improve accessibility.
Final Thoughts
FaceTime’s new recording tools make podcasting easier than ever. From high-quality audio capture to built-in transcription, iOS 18 provides essential features for podcasters using an iPhone or iPad.
While it’s not a replacement for professional studio setups, it’s a fantastic option for beginners or anyone looking to record podcasts without extra equipment. So, if you’re ready to start your podcast, grab your iPhone, open FaceTime, and hit record!